

In an effort to branch out into more complex adventures, here’s a great fresh pasta recipe that we happen to use for ravioli. Yes, this one is a bit complex, admittedly, and it requires a food mixer and a couple of special attachments but stick with it and dare to fail.
Obviously, you can fill them with your choice – we’ve tried mushrooms and shallots, but sausage and sage would be equally as good. The real key is to make the pasta as thin as possible (done through a series of processes in a Free Standing Food Mixer with a flat/sheet pasta attachment) and to not make the ravioli themselves too big.

For the fresh pasta you’ll need: 1-1/4 cups flour (there are lots of different ways to go with the flour choice – some use a mixture of two or three, some stay with just your basic white [or wheat] flour, we used just white flour here to keep it simple), 2 eggs, 1 Tbsp olive oil, a pinch of salt and about 1/4 cup or less of water (use this to modulate the thickness of the dough as it forms).
For the ravioli filling you’ll need: 2 red peppers (cut in half and seed-cores removed), a large handful of spinach (washed well, stems removed and roughly chopped), olive oil, 2 cloves garlic, crushed red pepper, salt and pepper.
For the sauce you’ll need: fresh sage (about 2 large Tbsp, chopped), 1 small shallot, 4-6 Tbsp unsalted butter, 1-2 Tbsp heavy cream, salt and pepper.
Pre-heat the oven to 375.
First – get the dough going. For all of this, we are going to use the free standing food mixer with a “bread hook” attachment and a “flat pasta roller” attachment.
One of these…

…with one of these:
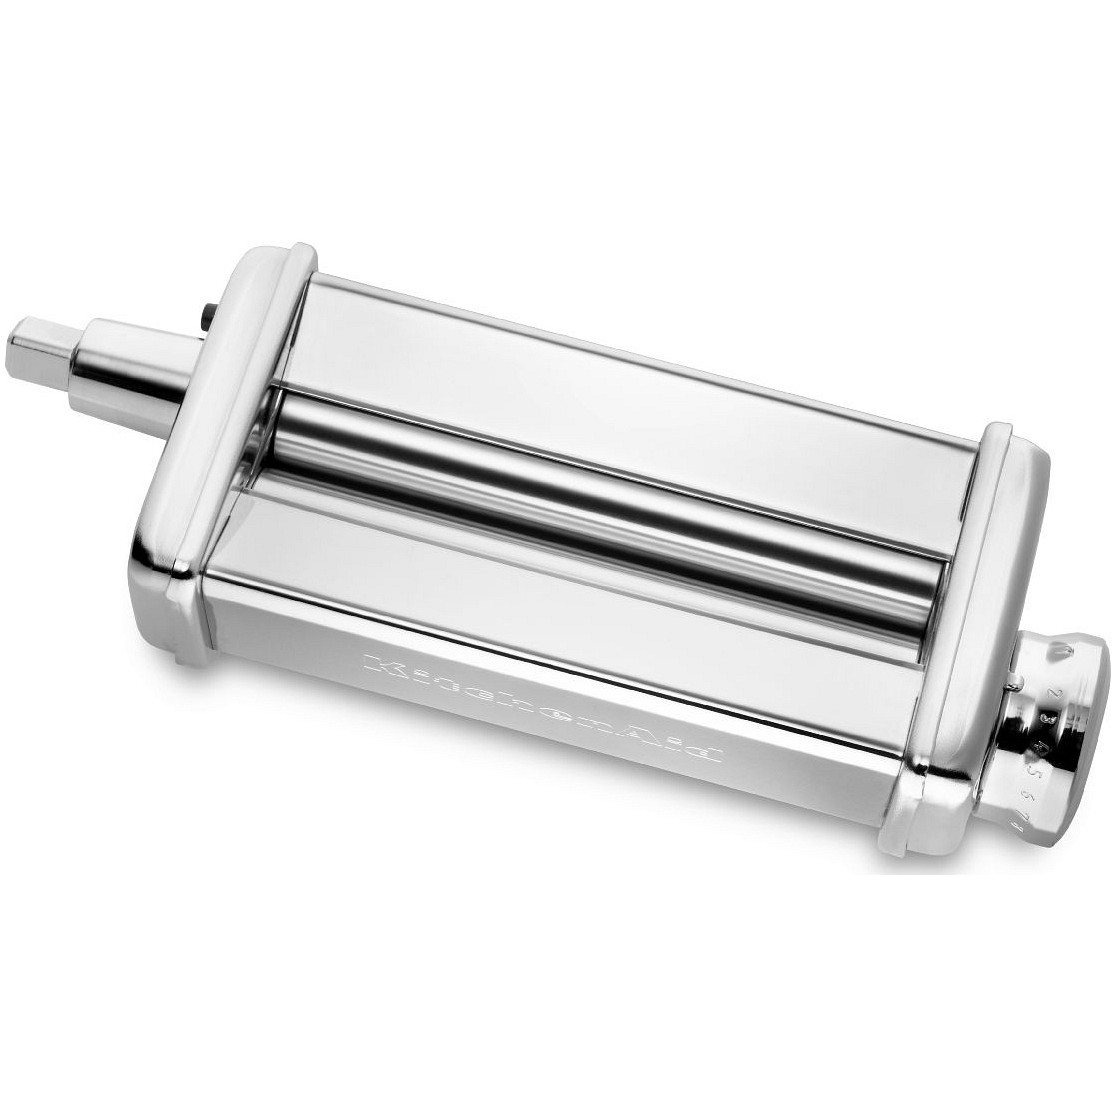
You can certainly make the pasta without one of these machines, easily, but making the thin ravioli without the roller attachment may prove difficult.
Place all of the pasta ingredients in the mixing bowl, holding back a Tbsp of water and flour just to modulate the consistency of the dough ball once mixed. Place the “hook” attachment onto the food mixer and start mixing the ingredients at a low setting. You’ll need to stop once or twice and scrape the sides of the bowl back into the middle with a rubber spatula. As a ball forms, add (or don’t) your water or flour in order to make sure the ball stays firm, but in tact – not loose or sticky. Once it is completely mixed, dust your hands with flour and remove the ball – kneading it for about 5 minutes in your hands – keeping them well dusted with flour. Flatten and then turn in on itself, and flatten again. Finally, wrap the ball in plastic wrap and set aside at room temperature for an hour.
Now, start the filling. Cut the 2 red peppers in half and remove the ribs and the seed cores, then place all four halves in a medium bowl. Sprinkle about 2 Tbsp of olive oil over the top, about 1/2 tsp of crushed red pepper, then salt and pepper to taste and toss all of this together with your hands ensuring that both the inside and the outsides of the pepper halves are covered with the oil mixture. Place all four halves face down on a baking tray lined with foil (and smeared with a little olive oil throughout) and put into the pre-heated oven for 45 mins (or until the skins start to brown and separate from the pepper itself).
As the peppers start to reach the end of their roasting process, put a little olive oil in a shallow skillet, heat the oil over medium heat and add the 2 garlic cloves, sliced thinly and sauté for 30 seconds. Then reduce the heat slightly and add the chopped spinach with a little salt & pepper. Stir quickly over medium heat until the spinach has wilted completely – about 3-5 mins. Turn off the heat and set aside in the skillet for the moment.
Once the peppers are completely roasted, remove from the oven and let cool for a few minutes. Once you can pick them up without burning yourself, remove the outside skins which should now be separated from the meat of the pepper. They should peel off easily, but you can use a sharp paring knife to help. Slice the pepper into wide strips and place them, along with the spinach/garlic mixture and about 1 tsp olive oil into a food processor and puree until chunky.
Now, let’s return to the pasta. Once you’ve let it stand for an hour at room temperature, remove it from the plastic wrap, pound it down into a 1/4″ thick square or rectangle and cut in half. Working with one half only for now, cut in half again, and make a thinner square – maybe about the size of a postcard.
Place the flat/sheet pasta attachment onto the food mixer and place it on the widest setting. Make sure your hands and your work surface are well dusted with flour and run your first rectangle through the pasta roller. Then fold it into thirds (like a letter) and run it though the roller again on the same, widest setting. You’ll be working with rectangles, so always put the short end through the roller first, so you will end up rotating the sheet with each pass.
Repeat this about 5-6 times. Then set the roller to the next setting – going thinner, and run the pasta sheet through, narrow end first. Do this a few more times, each time going one setting thinner, until you have a thin but not broken wide strip of fresh pasta. It will get harder to handle as it gets thinner and longer, so you may actually need some help as you get to this phase. Remember: stay dusted!
Repeat the whole process with the other rectangle (half of 1/2), and place the two wide strips along side one another on a well dusted surface.
You will be folding one long half over to the other side on each strip, so keep that in mind. Place about 3/4 tsp “dollops” along one long edge of the strip keeping about 1″ between each dollop and about 3/8″ at the far edge of the sheet. With your fingertip, rub a little water along the outline edges of the dollops to act as a sealer for each individual (future) ravioli. Fold the empty long half over the dollop-ed long half and press each mound gently to ensure that all the air escapes and the “water seal” you formed with your fingertip is well adhered.
Do the same process with the second strip of pasta (you will still have a leftover second half of your original ball if you want/need more ravioli – or freeze it to save it for later).
Using a sharp knife or even a pizza cutter, cut the raviolis out of the strips – square or round, it is up to you. We then press the outer edges of the raviolis with the prongs of a fork just ensure the seal around the outside is well-held.
Bring a large pot of salted water to a bowl and cook in batches for 2-3 minutes.
In a skillet, melt the butter and add the chopped fresh sage and the chopped shallot. Keep everything moving over medium heat so you don’t burn the butter, but you let everything brown slightly. Then add the heavy cream and swirl the entire mixture well.
Add the raviolis quickly to the butter mixture, stir to coat, remove and serve – with sauce spooned over the top. You can add a sprig of parsley or a few leaves of sage as a nice garnish and some shaved parmesan.
It’s worth it in the end – very, very tasty.
